Colorizing Papers
Colorizing papers that have texture and designs is much easier than it seems. So lets give it a try. This tutorial is for Photoshop Elements.
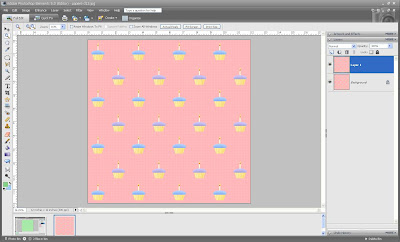
Open your paper. Here I opened one of the cupcake papers similar to the one's in this month's Birthday kit, but not with the same background. In this tutorial, I'm going to colorize the paper with it's texture and also the top of the cupcakes. Duplicate the layer by pressing ctrl+j or drag the layer up to the new file icon. From the colors palette, choose the foreground and a background colors that you want for your new paper.
Use the magic wand to select the pink background with it's texture. To be able to select the whole background, you will have to increase the tolerance in the options bar. Zoom in to actual pixels and experiment by starting with a small number (ex. 10 px). If that didn't select everything you want to include, delete the step in your undo history palette and increase the tolerance a little more. Keep doing this until you are able to select everything but the cupcakes with the candles.

On top of the layers palette, click on the half black/half white circle and from the menu select "Solid Color". Your paper might change to the foreground color, but will not have the texture. Then go to the the blending modes (drop down menu below the word "levels" in the Layers Palette). Click the down arrow and go all the way down to "Color". Most of the time it will show the correct foreground color and the texture. If it doesn't, toggle through the different blending modes with your up and down keyboard arrows and very likely you will find one with the right color.

Now I want to change the color of the cupcakes frosting, so that they are all blue. In the original paper some are blue and others purple. Use the magic wand to select the blue ones from the top copy of the paper. Change the tolerance, as previously described, to select all the blue ones. If purple ones are also selected, it doesn't matter, so leave it like that. A tolerance of 30 worked for me.
 Make sure that you have a foreground color of your choice selected (look at the bottom of the tool bar). As with the paper, choose "Solid color" adjustment layer. Make sure the adjustment layer is above the copy of the original paper. Then in the blending modes menu select "Color". If necessary, toggle through the other blending modes.

I hope you enjoyed this tutorial and learned something new. I would appreciate your comments and suggestions. Sorry for the small images and any typos.
Labels: colorizing paper, recolorizing paper
posted by T Van Noord @ Friday, August 10, 2007
0 comments
![]()
